스파르타코딩클럽 - 항해99/항해99 Chapter3 - react 주특기 기본
Chapter3 - 2주차 숙제
Ming
2021. 11. 18. 02:15
App.js
|
import React from "react";
import logo from "./logo.svg";
import "./App.css";
import Start from "./Start";
function App() {
const [name, setName] = React.useState("우민기");
return (
<div
className="App"
style={{
maxWidth: "350px",
margin: "auto",
}}
>
<Start name={name} />
</div>
);
}
export default App;
|
Start.js
|
import React from "react";
import img from "./Teemo.png";
const Start = (props) => {
console.log(props);
return (
<div
style={{
display: "flex",
height: "100vh", //가운데에 놓기위해 높이를 지정해준다.
flexDirection: "column",
alignItems: "center",
justifyContent: "center",
padding: "16px",
boxSizing: "border-box",
//display flex에는 가운데 정렬을 담당하는 두 친구가 있는데
//align-items: center; 세로줄 하나를 기준으로 모인다. flex가 없으면 가로기준으로 중간정렬을 해준다.
//justify-content: center;는 flex가 있을땐 위아래로 없을땐 좌우로 정렬을 해준다.
}}
>
<img
src={img}
style={{
width: "60vw",
margin: "16px",
}}
/>
<h1 style={{ fontSize: "1.5em", lineHeight: "1.5" }}>
나는{" "}
<span
style={{
backgroundColor: "#afe910",
padding: "5px 10px",
borderRadius: "30px",
}}
>
{props.name}
</span>
에 대해 얼마나 알고 있을까?
</h1>
<input
style={{
border: "1px solid #dadafc",
borderRadius: "30px",
padding: "10px",
width: "100%",
}}
/>
<button
style={{
padding: "10px 36px", //버튼크기
backgroundColor: "#dadafc",
border: "#dadafc",
borderRadius: "30px",
margin: "36px 0px",
}}
>
시작하기
</button>
</div>
);
};
export default Start;
|
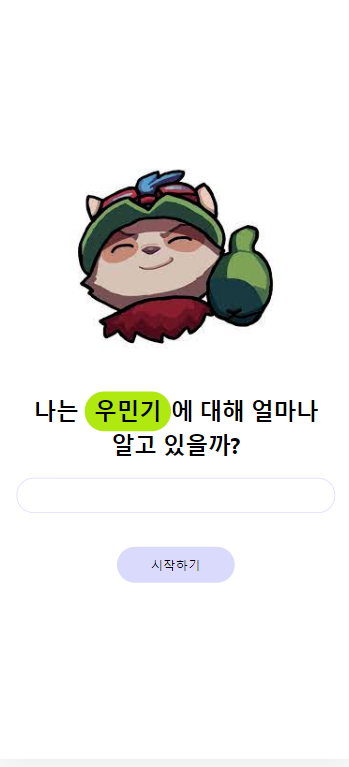
이미지는 꼭 png 파일로 src 디렉토리에 넣어주기!!
결과물 - iphone X 기준으로 만들어 보았다.